One of the topics we have been asked about most often since we started this little blog of ours has been photography. I’ve been a little hesitant to write any type of photography advice post because frankly I’m not really a photographer, I just really like to take pictures. But Megan and I were discussing and we figured a couple of tips couldn’t hurt. We were really lucky when we first started taking pictures because right when Corey bought me my DSLR, my wedding photographer Abigail Seymour invited us to go to a photography class she was teaching. Alas, I don’t think she is teaching it anymore or I would be sending you all her way. Nevertheless, she taught us a few tricks that helped us through the murky world of camera settings. I’ve also read quite a bit both online and in books. Like with anything else, the thing that will help you most is practice. I learn something new every time I pick up the camera (usually by messing something up). Here are just a few things that might help if you are just starting out with your DSLR.
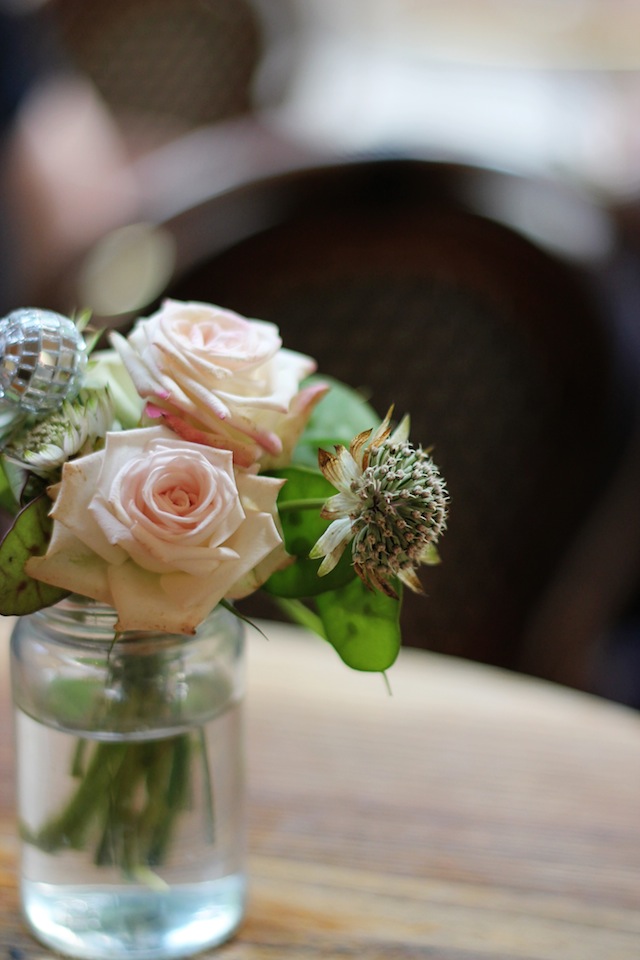
(F 1.8, ISO 400, Shutter Speed 1/320)
1) Camera mode – Megan and I almost always shoot in either Aperture Priority (Av) or Manual Mode. If you have a DSLR and only shoot in Automatic, stop! This is essentially like shooting with a point and shoot, or even your cell phone. The great thing about DSLR cameras is that you can manipulate all of the camera settings to get the picture to look how you want it to. If Manual is super scary to you, try using Aperture Priority. What that means is that you set the Aperture and the ISO, and the camera will select the shutter speed you need to get the correct exposure. Is that all gibberish? Read the next paragraph.
2) Aperture, ISO, and Shutter Speed – These are the three settings that control how much light that your camera needs to take a picture. Light is everything in photography.
The aperture, or f stop, goes from a low number (dependent on your lens) to a high number (typically 22 I think). If the aperture is set on a low number, say 1.8, then only a small portion of your picture will be in focus. For portraits or detail shots, you want a lower aperture so whatever you are taking a picture of is the main focus of the screen, and everything else is blurry and pretty looking. We mostly shoot at lower apertures (1.8 – 2.2) because we take so many detail shots. For a landscape or shot of a full family, or any other picture where you want everything in focus, you want a higher aperture number. The tricky part about apertures is that the lower numbers let more light in, allowing you to have a shorter shutter speed. A higher number lets less light in, making it so that you need a longer shutter speed to have the correct exposure. If your shutter speed is too long, you are more likely to become a victim of camera shake, making your image blurry.
The ISO is basically how sensitive your camera is to light. At lower ISO numbers, your camera is less sensitive to light. At higher ISO numbers, it is more sensitive to light. If you are in a really low light situation, you might want to turn up your ISO so you can take the picture without a long shutter speed that will cause camera shake. The major issue with this is that it can cause graininess in the picture. In an ideal world, your ISO will be 100 or 200, which will produce a higher quality picture, but we are not in a perfect world. I will go up to 800 if I need to, but rarely go over that.
The shutter speed is how long your camera’s shutter is open. I typically adjust the other two settings first and then alter the shutter speed to get the correct exposure. If you are in aperture priority, the camera will do this for you.
Let’s look at some examples
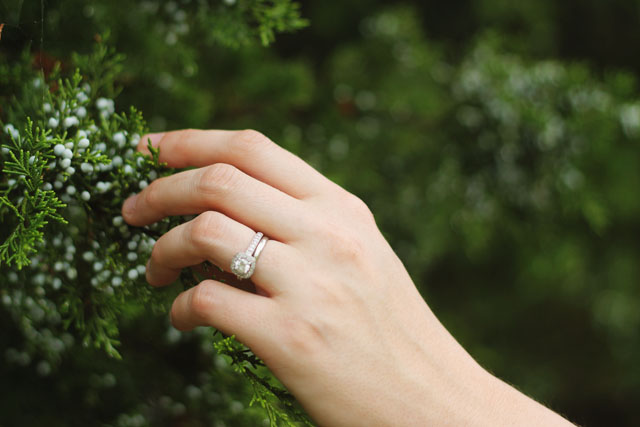
(F 2.2, ISO 100, Shutter Speed 1/800)
In this picture taken during Craig and Catrina’s maternity pictures, I only wanted the hand in focus, so I used an aperture of 2.2. I used an ISO of 100 because it was a sunny day with a lot of light. I was using aperture priority when I was taking this picture so the camera chose the shutter speed for me.
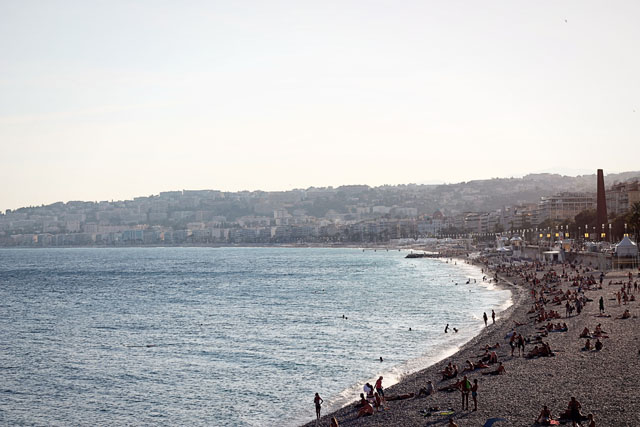
(F 7.1, ISO 100, Shutter Speed 1/499)
For this picture of the Promenade des Anglais in Nice, I wanted everything to be in focus so I used a higher aperture number. Landscape photographers would recommend using 22, but I used 7.1 because I didn’t have a tripod and was scared that if I went all the way to F 22 then there would be some camera shake. Again, it was a sunny day so the ISO was set at 100. The shutter speed was chosen to get the correct exposure.
3) Equipment – We both use the cheapest DSLR on the block – the Canon T3 Rebel. The lens that the camera comes with is not my favorite, although it is ok in a pinch. The lens that we both use 99.9% of the time is the 50 mm 1.8. This is a prime lens, which means that it doesn’t zoom in or out, but the aperture number will go much lower than the kit lens that a standard DSLR comes with. This is particularly important for detail shots or if you are shooting in a low lighting condition. And it makes things look like angels. The 50 mm 1.8 is one of the best priced lenses on the market as well, making it more reasonable for us enthusiasts to purchase.
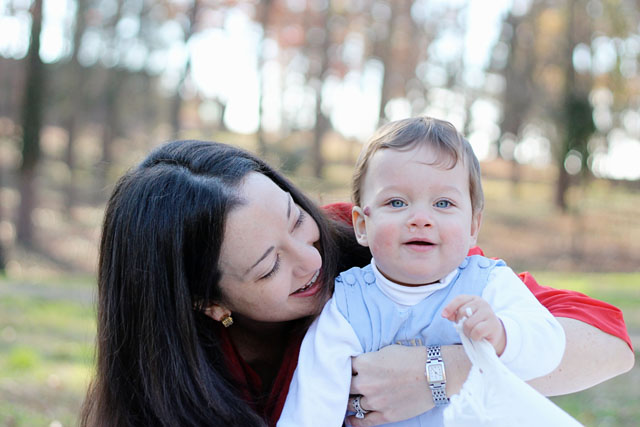
(F 2.5, ISO 400, Shutter Speed 1/1250)
4) Photo Editing – There are some free software options for editing, such as Picasa or even iPhoto, which I used for a while. We both use Photoshop Elements which is only about $100 and has most of the photo editing features of full on Photoshop (which costs like 10 times more). I use RadLab for my Actions, which costs money, but Megan mostly uses Pioneer Woman Actions, which are completely free.
I hope that is helpful. Let me know if there are any confusing parts or if you guys have any questions!

Great tips Bean.
I printed it out so I could review it again. The class you sent me to helped to Colleen. It would be great for your friends that have babies too because they teach the Moms (grandmas too) how to take good pictures of their babies. It’s Madison Lane Photography.
The review will be good for the trip to New Orleans next week!!!!!
DUDE. thank you for this. I’m so lame w/ my DSLR it’s not even funny…
Good tips!
I shoot in Auto a lot (mostly for speed) but for someone just learning, its really important to know how the camera works and the only way to do that is to shoot in other modes.
Ultimately I think composition is what makes a good photo vs. a bad photo and that is something that is very hard to teach or even explain as there aren’t any hard and fast rules.
Thanks for this great easy guide. I’m going to start calling you “Bean”.
A future good story would be on shooting RAW.
Hi….The photos on your blog are GREAT ! Can you tell this wannabe photographer what camera you own ? I will be shopping for a new camera soon ( I am graduating from the pocket size point and shoot).
Thanks !
Hey Timothy! Thank you so much! We both just use a standard Canon Rebel T3 – the newest version I’m sure is much better than ours. If I were you I would start with an entry level DSLR (Canon or Nikon, whichever you choose) and then whenever you can get a 50 mm 1.8 lens for about $100. Much better than the kit lens that comes with it. Thanks for reading!